
Pumpkin Cup Cosy - Free Pattern
The '-ber' months are here and with that comes Pumpkin Season.
I for one want cute little pumpkins adorning everything! I've got some plush pumpkins on my mantel piece, a pumpkin garland above my desk and now I have a pumpkin cup cosy for my favourite seasonal beverages!
I don't know if it's just my local Starbucks (other coffee shops are available) that don't always give out the cardboard sleeves anymore but I know that if I don't have one my coffee ends up burning my hand. To solve this problem I have designed the super cute Pumpkin Cup Cosy and I now keep one in my bag and one in the car so that I always have one to hand.
Using this pattern you can now make one too! I am also pleased (and extremely nervous) to say that you can now get a full tutorial for this pattern on my YouTube channel! Click here to view! ♡
Yes, your girl has started a YouTube channel! I so often get asked for videos for certain patterns or parts of patterns so I thought it was about time and this seemed like a nice simple pattern to begin with as I have never filmed a full length tutorial before. Please do go and like and subscribe to my YouTube channel if you would like to see more free pattern tutorials in the future!
The Pattern
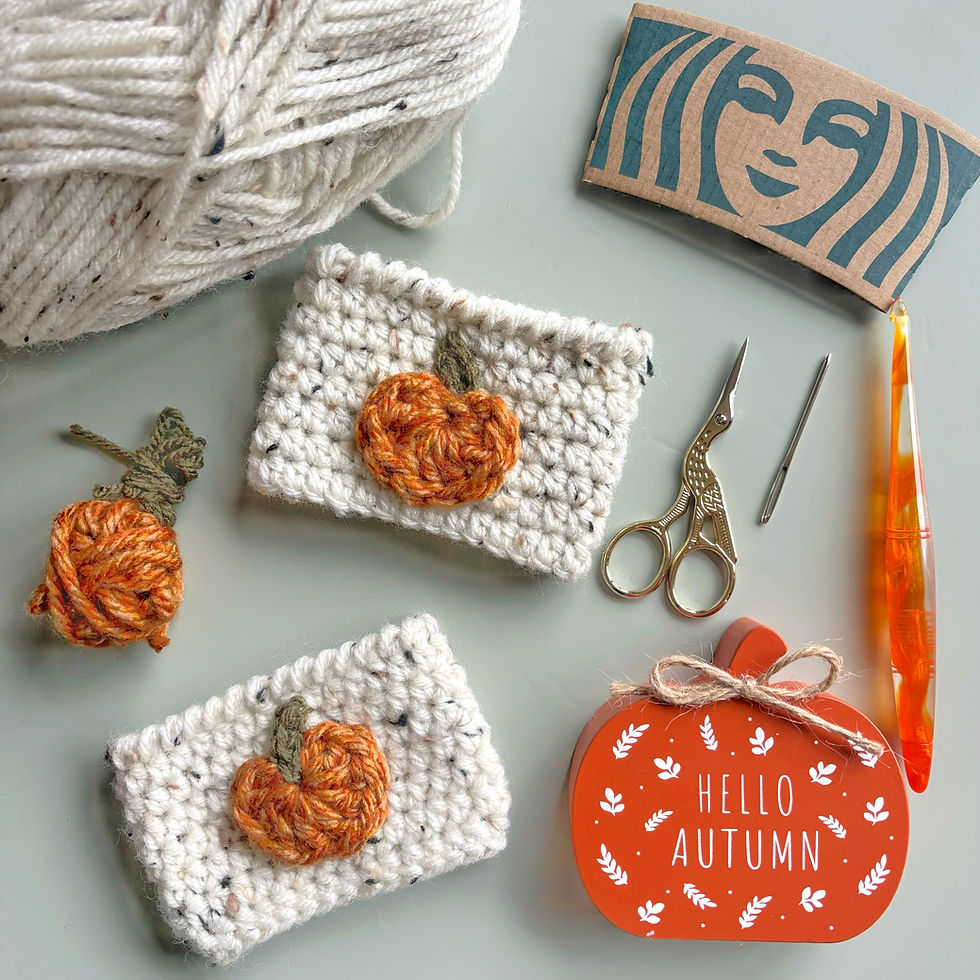
You will need:
Chunky/Bulky/5 weight yarn in your main colour. I used Stylecraft Life Chunky in Natural Neep*
Scrap yarn in pumpkin shade - I used a super chunky yarn but chunky or aran would also work.
Scrap yarn for stalk - I used aran weight yarn
5mm hook for sleeve
6.5mm and 4mm hook for pumpkin applique
Large eye tapestry needle
Measuring tape
Scissors
Stitch Abbreviations
(US Terms)
St/s - stitch/es
Ch - chain
Sl st - slip stitch
MR - magic ring
SC - single crochet
HDC - half double crochet
DC - half double crochet
Crab stitch - reverse single crochet.
Sleeve/Cosy:
Using main colour and 5mm hook
Ch 30
Row 1:
HDC into the 2nd ch from the hook and in each ch along. (29 sts)
We will now sl st to join to the first HDC of the row to join so that we can begin to work in the round. Ensure that your work is not twisted.
Ch1, do not turn.
Rnd 2:
HDC into each st around. Sl st to join and ch 1. (29 sts)
Here you will want to measure the width of your cup cosy and it should be approximately 4.25' or 11cm wide.
Rnd 3-7:
Repeat round 2.
Rnd 8 - Crab stitch border.
To create the crab stitch (reverse single crochet) border you work around the cosy anticlockwise, the opposite way to that which you would normally crochet. SC into each st and each chain space around, sl st to the first st to join.
Fasten off your yarn and weave in your ends. Use the end from the start of your work to close the gap at the bottom of your cup cosy from where we joined the initial row.


Note - if you have a very visible seam (usually on darker colours) that you find unappealing then when working your rounds, skip the first st at the base of the ch1 and work your final st into the sl st from the previous round.
Pumpkin Applique:
Using your pumpkin shade
Hook size depends on weight of yarn. My recommendations would be: super chunky/chunk - 6.5mm, aran - 5mm
Rnd 1:
Working into your MR, SC, 7DC, SC.
Fasten off and weave in your ends.
Stalk/stem:
Using aran yarn and a 4mm hook
Attach your chosen colour to the pumpkin by pulling up a loop through the MR and ch4.
Sc into the 2nd ch from your hook and into the next 2 chs. Sl st through the MR to join.
Fasten off, leaving a tail long enough for attaching the stalk. Weave in your other end.


Attaching Applique
You can either sew your applique on or use a glue gun, the choice is yours.
To sew your pumpkin onto the sleeve, take a long strand of your pumpkin colour yarn and use that to sew through each stitch of your pumpkin onto the sleeve. Then using your tail from the stalk, sew around the stalk to secure in place.
Weave in all of your ends and your Pumpkin Cup Cosy is finished and ready to adorn your next seasonal beverage!
What is your go to order for this time of year? Are you a PSL lover or do you prefer a Chai Tea Latte like me?
I really hope that you enjoyed making this free pattern. I'd love to see your work so please do tag me in your posts on social media @Brambles.and.Hart and use the hashtags #BHPumpkinCupCosy #BHFreePatternMakes #BramblesandHart


Comments